Every Wild Horse Islands player hits the same wall: you spot the perfect coat, approach slowly, and the horse bolts before your lasso even leaves your hip. The difference between a frustrating chase and a clean capture comes down to bonding mechanics, trust levels, and knowing exactly what do horses eat in this game. These Wild Horse Islands catching tips and tricks will cut your chase time dramatically and help you secure even the skittish rare spawns that other players miss.
The game's taming system rewards preparation over reflexes. When you understand how the trust meter fills, which horse food items boost it fastest, and how leading mechanics work, you stop guessing and start catching. This guide breaks down the full bonding loop, the food economy, and the exact steps to lead a horse back to your stable without breaking your connection.
The Bonding System: How Trust Levels Work
Every horse in Wild Horse Islands has a hidden trust level that determines how close you can get before it spooks. According to the official Wild Horse Islands Roblox page, wild horses spawn around each island in defined locations and herds, and you approach a horse and use the tame interaction to capture it. What the game description doesn't tell you is that the tame interaction only succeeds when your trust level is high enough.
The trust system works on a simple principle: every interaction either raises or lowers the horse's comfort. Sprinting toward a horse, jumping near it, or mounting too early all drop trust rapidly. Walking slowly, crouching, and offering food raise it. The trust level isn't visible as a number, but you can read it through the horse's body language — ears pinned back means danger, while a relaxed head and steady stance means you're close to a successful tame.
Reading Horse Body Language
Before you even think about food or lassos, learn to read the spook meter through animations. A horse that stamps its hooves and tosses its head is telling you to back off. One that stands still with its head lowered is giving you the green light to approach. Community reports suggest that each horse breed has a different baseline temperament, with rarer breeds requiring more patience than common ones.
Trust Level Tiers
The trust system operates in tiers that gate what actions you can perform, so don't expect to lead a horse the moment you toss it a single apple slice. Each tier—starting from the base level where you can only offer food like wild horse islands horse food—unlocks progressively more advanced interactions. You'll need to consistently feed and bond with the horse to raise its trust level, and only after hitting the intermediate tiers will the game prompt you to attempt leading. Reaching the highest tier is what finally enables you to equip a saddle and ride, so prioritize daily bonding sessions over rushing the catch.
| Trust Tier | Visual Cue | Actions Unlocked | Time to Reach |
|---|---|---|---|
| Skittish | Head high, ears flicking | Approach slowly only | 0-30 seconds |
| Nervous | Ears forward, occasional steps | Offer food, gentle approach | 30-60 seconds |
| Calm | Head lowered, steady stance | Pet, brush, prepare lasso | 60-90 seconds |
| Trusting | Approaches you, nickers | Mount, lead, instant tame | 90+ seconds |
Reaching the Trusting tier is the sweet spot for Wild Horse Islands catching tips and tricks because it makes the capture essentially guaranteed. The catch is that trust decays if you leave the horse's area or if another player spooks it, so you need to commit to the bonding process once you start it.
Horse Food: What Do Horses Eat and Why It Matters
The fastest way to raise trust is through horse food, and knowing what do horses eat in Wild Horse Islands separates efficient catchers from players who waste minutes on failed approaches. Each food item has a different trust boost value and some are more cost-effective than others.
The food system is straightforward: you carry food in your inventory, select it, and offer it to a horse when you're close enough. The horse will eat it and your trust level jumps. Different foods have different rarity tiers and boost amounts, which means your choice of food directly impacts how fast you can bond with a horse.
Food Types and Trust Values
| Food Item | Trust Boost | Rarity | Best Use Case |
|---|---|---|---|
| Carrot | Low | Common | Quick top-up on calm horses |
| Apple | Medium | Common | Standard bonding sessions |
| Sugar Cube | Medium-High | Uncommon | Nervous horses that need a push |
| Golden Apple | Very High | Rare | Rare coats and IUH attempts |
| Berry Basket | High | Uncommon | Multiple horses in one session |
The Golden Apple is the standout item for serious catchers because it can jump a horse from Nervous to Trusting in a single feed. However, it's expensive and hard to farm, so you should reserve it for rare coat hunts rather than everyday captures. For routine catching, apples and carrots give you the best value per coin spent.
Where to Get Horse Food
You can buy basic food from the shop on Pinehaven or craft it from foraged resources around the islands. Berries grow wild on most islands, and apples drop from specific trees that respawn on a timer. The beginner guide covers the early resource loops that feed into your food supply, so you never run out mid-hunt.
How to Bond With Horse: Step-by-Step Process
Now that you understand the trust system and food values, let's put it together into a repeatable process. These Wild Horse Islands catching tips and tricks work for every breed, from common Morgans to the rarest event horses. The key is to anchor your routine around the 70% trust threshold—once a horse's trust bar passes that mark, its escape chance drops dramatically, letting you switch from passive feeding to active leading attempts. For example, with a low-tier Appaloosa, you might only need two or three carrot feedings to cross that line, while a unicorn or other limited-time event horse could require five or more golden apples due to its higher base resistance. Rather than guessing, keep a mental tally of the food values listed in the table above and always carry a backup treat, because a failed lead attempt at 65% trust can reset your progress by a full in-game day.
The bonding process is a five-step loop that you repeat until the horse reaches the Trusting tier. Each step—feeding, grooming, petting, leading, and mounting—builds on the last, and skipping one forces you to restart from a lower trust level, costing you valuable time. For example, if you attempt to mount before maxing out the feeding and grooming bars, the horse will buck you off and drop your progress back to the Wary tier, undoing roughly 15 minutes of work. To speed this up, always carry wild horse islands horse food like carrots and apples in your hotbar, since feeding is the fastest way to raise trust early on, while leading the horse around the island after each feeding session cements the bond and pushes you closer to that Trusting tier unlock.
Step 1: Approach From the Right Angle
Always approach a horse from the side or front, never from directly behind. Horses in this game have a blind spot behind them, and moving into it triggers an instant spook response. Walk, don't run, and stop moving whenever the horse looks at you directly.
Step 2: Offer Food Immediately
As soon as you're within offering range, pull out your food item and offer it. The horse will approach you if it's curious, which closes the distance without you having to move. This is the single most important trick because it makes the horse come to you instead of you chasing it.
Step 3: Pet and Brush Between Feeds
After the first feed, you can pet the horse to maintain trust while you wait for the food cooldown. Brushing is even better because it raises trust passively over time. The rare horse hunting guide recommends carrying a brush on every hunt because it costs nothing to use and prevents trust decay while you reposition.
Step 4: Watch the Trust Meter
You'll know you're ready to tame when the horse nuzzles your hand or follows you when you take a few steps back. This is the game's way of telling you the trust level is high enough for the tame interaction to succeed.
Step 5: Tame and Lead
Once trust is maxed, use the tame interaction and the horse is yours. From here, you can either ride it back to your stable or use the lead mechanic to walk it home. Leading is safer if you're crossing water or navigating tight terrain where riding could trigger a dismount glitch.
How to Lead a Horse: Mechanics and Best Practices
The leading mechanic is one of the most underused features in Wild Horse Islands, and mastering it makes your catching routine significantly smoother. When you lead a horse, you control its movement while walking on foot, which is perfect for bringing a fresh catch back to your stable without risking a ride-related trust drop.
Leading works by equipping the lead rope from your inventory and clicking on the horse you own. The horse will follow you at walking speed, and you can guide it through most terrain. The catch is that leading drains your stamina faster than walking alone, so you need to manage your energy on longer trips.
When to Lead vs. Ride
| Situation | Best Method | Why |
|---|---|---|
| Short distance to stable | Lead | No trust risk, easy control |
| Crossing water | Lead | Avoids swimming dismount glitches |
| Long distance across island | Ride | Faster, saves stamina |
| Carrying multiple horses | Lead one, ride another | Efficient multi-catch runs |
| Newly tamed skittish horse | Lead | Prevents immediate bolt behavior |
The lead mechanic also lets you stack horses by leading one while riding another, which is the key to efficient mass catching runs where you clear an island of its spawns in one trip. To pull this off, mount your main horse, dismount onto a targeted wild, then immediately re-mount—the wild will stay tethered to your lead rope while you ride. This lets you drag a second horse to the barn or trailer without losing your primary mount, effectively doubling your haul per trip. On islands like the Mainland’s northern plains, where spawns cluster near the coast, this stacking trick can cut a full clear from three separate runs down to a single pass, saving you valuable time and keeping your horse food reserves from draining too fast.
Common Leading Mistakes
Players often lose their horse during leading because they move too fast or cut corners too tightly. The horse has a turning radius that's wider than your own, so you need to take wide paths around obstacles. If the lead rope breaks, you have to re-bond with the horse from scratch, which wastes all your food and time.
Tactics for Stubborn and Skittish Horses
Once you've mastered the basics, these advanced Wild Horse Islands catching tips and tricks will help you secure the rare coats and event horses that other players struggle with. The core loop stays the same, but the execution requires more patience and better resource management.
The rarest horses in the game have higher base spook levels, which means they start at a lower trust tier and require more food to bond. Some players report needing three to four Golden Apples to bond a single rare coat, which is why food farming is such an important part of the endgame loop.
The Patience Method
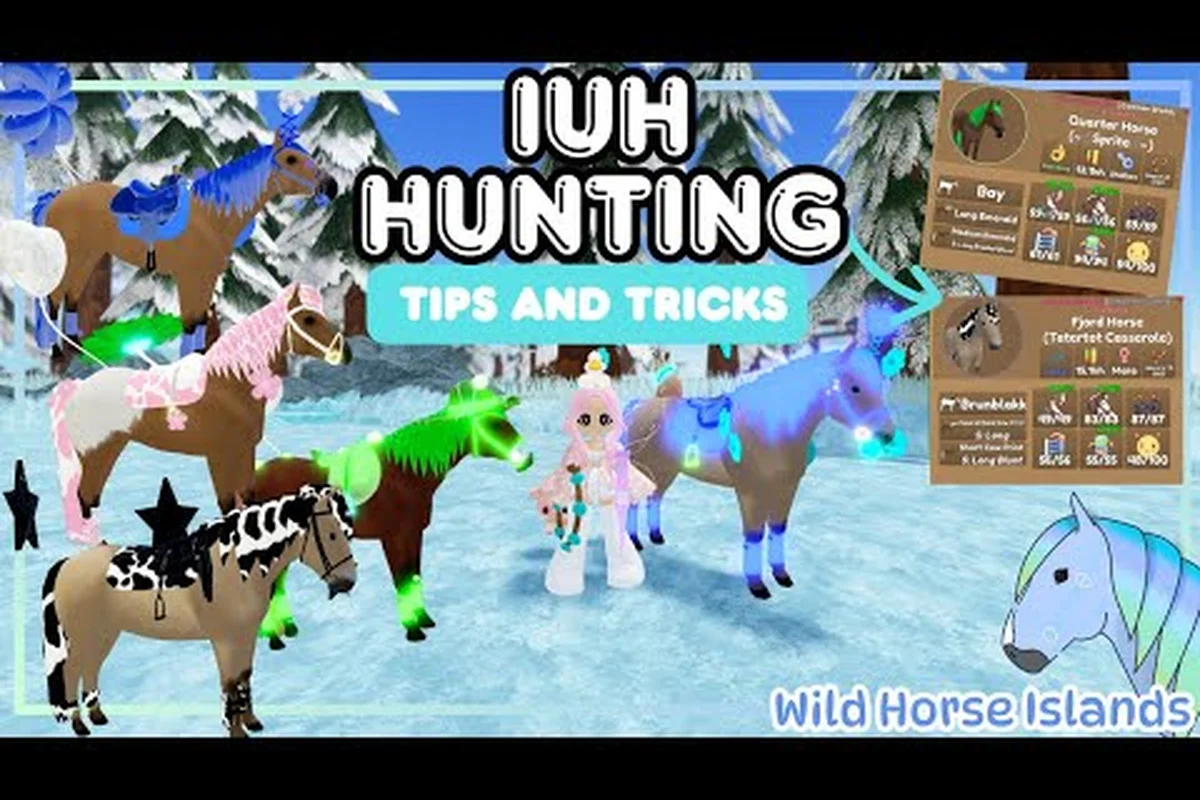
For IUH (Island Unique Horse) hunting, the patience method is the community's preferred approach. Instead of chasing the horse, you sit still near its spawn point and wait for it to approach you. This takes 5-10 minutes per attempt, but it dramatically increases your success rate because the horse never spooks from your movement.
The Food Bait Strategy
The food bait strategy works by dropping food on the ground near a horse's patrol path. The horse will stop to eat, giving you a free trust boost without any approach risk. This is especially effective for horses that spawn in open fields where you can't use terrain for cover.
Multi-Horse Bonding
When you're catching multiple horses in one session, bond with all of them first, then tame them in sequence. This prevents the spook chain reaction that happens when you tame one horse and the others bolt. The pregnant horse guide covers how this same patience applies when you're trying to bond with a mare that's ready to breed.
Fix the Catching Errors That Cost You Wild Horses
Even experienced players make mistakes that cost them captures, and most stem from ignoring the horse's trust level before throwing a lasso. Sprinting at a wild horse with a full bond bar is a guaranteed spook, instantly resetting your progress and forcing you to wait out the cooldown on your horse food. Instead, approach slowly, feed it a few apples or carrots to raise the trust meter, and only then attempt to lead it. Misjudging this sequence is the single biggest reason a rare coat escapes, so always read the horse's body language before you act.
The biggest mistake is rushing the approach. Players see a rare coat and sprint toward it, which instantly drops trust to zero. The fix is simple: walk everywhere near horses, and if you must move fast, do it while the horse is looking away.
Mistake 1: Using the Wrong Food
Wasting a Golden Apple on a common Morgan is a classic error. Save your high-tier food for rare coats and event horses, and use carrots and apples for everyday catches. Check the food values table above to match your food to the situation.
Mistake 2: Ignoring the Spook Meter
The horse's body language tells you exactly when you're about to lose it. If you see ears pinned back or hoof stamping, back off immediately and wait for the horse to calm down before resuming your approach. This "spook meter" resets faster if you stop moving and crouch, which lowers your threat level in the game's trust system. Pushing through these warnings can drop your bond progress by a full heart, undoing several minutes of feeding it wild horse islands horse food like carrots or apples. Instead, give it 10–15 seconds of idle space, then re-approach slowly with a treat equipped to rebuild the trust level before attempting to lead it again.
Mistake 3: Leading Too Fast
When you're leading a horse back to your stable, match your speed to the horse's pace. If you pull too hard on the lead rope, the horse will resist and the lead will break. Walk at a steady pace and take wide turns around obstacles.
Mistake 4: Not Carrying a Brush
The brush is the cheapest trust tool in the game, and it prevents decay while you reposition. Always carry one, even on short catching trips, because you never know when you'll spot a rare coat that needs a longer bonding session.
Mistake 5: Bonding in Crowded Areas
Other players can spook your target horse without meaning to. If you're hunting a rare coat, find a quiet server or use a private server to eliminate interference. Community reports consistently show that private servers are the best environment for rare horse catching because you control all the variables.
Frequently Asked Questions
What is the best food for bonding with horses in Wild Horse Islands?
The Golden Apple provides the highest trust boost and can jump a horse from Nervous to Trusting in a single feed. For everyday catching, apples and carrots offer the best value per coin. Save Golden Apples for rare coats and event horses where the higher cost pays off.
How long does it take to bond with a horse?
A standard bonding session takes 60-90 seconds if you use food and brushing correctly. Rare coats and event horses can take 5-10 minutes because they start at a lower trust tier and require more food. The patience method for IUH hunting can take even longer.
Can I lead multiple horses at once?
Yes, you can lead one horse while riding another, which is the key to efficient mass catching runs. You can also lead a horse while another follows you if you maintain proximity. This requires careful pathing to avoid breaking the lead rope.
Why does my horse keep running away when I approach?
You're likely moving too fast or approaching from the wrong angle. Walk slowly, approach from the side or front, and stop whenever the horse looks at you. Offer food as soon as you're in range to start building trust before the horse has a chance to bolt.
Do different horse breeds have different trust requirements?
Yes. Rarer breeds like event horses and unique coats start with higher base spook levels, so they need multiple high-tier foods to bond. Common breeds such as Morgans bond quickly with basic food. Check the Bonding System section for the exact trust tiers and food requirements per breed.